Locations:
Search IconSearch

A Step-By-Step Guide to Sun Salutations

Focus on inhaling and exhaling through 12 steps of a complete sequence

Yoga often involves continuous, flowing movement from one pose to the next. As you move, you focus on your breath and how you feel in your physical body.

Advertisement

Cleveland Clinic is a non-profit academic medical center. Advertising on our site helps support our mission. We do not endorse non-Cleveland Clinic products or services. Policy

Sun salutations are just one common example of how several poses can be combined to create a full-body practice that is both physically and mentally fulfilling. It has long been used as a way to honor the sun and engage in self-reflection year-round. In addition to its ancient yogic roots, it’s become a common practice in your average, modern yoga class.

Occupational therapist and yoga instructor Lynda Robinson, OT/L, RYT-500, explains how you can benefit from sun salutations and how to do them.

What are sun salutations?

Sun salutations (or Surya Namaskar) are a complete yoga practice that blends movement with breathwork (pranayama) to build awareness and strengthen the mind-body connection. This practice has deep cultural and spiritual roots as a way of honoring the sun. It originates from the Rig Veda, an ancient Indian collection of Sanskrit hymns.

Today, different styles of yoga practice sun salutations in different ways. But each version involves a series of poses or movements that can be done individually or as a complete sequence.

“Sun salutations have survived through various yogic lineages for thousands of years,” says Robinson. “A lot of people prefer to practice sun salutations at sunrise, while facing the rising sun. But you can do this practice at any time of day. It’s also accessible for anyone who’s able to get down and up from the floor.”

Advertisement

By doing Surya Namaskar (or any yoga, really), you benefit from improved:

  • Flexibility
  • Strength
  • Energy
  • Circulation
  • Mental health
  • Stress levels

The Kriya and Hatha Yoga approach to sun salutations

sunSalutations-art-800x2607
Sun salutation poses

There are many different kinds of yoga, and each does Surya Namaskar in its own way, with various similarities and differences. For example, some might incorporate poses like warrior pose, while others may not. You can practice what feels right for you.

As Robinson is trained in the Kriya and Hatha styles of yoga from the Bihar Yoga Bharati Institute, we’ll describe how to do sun salutations in that approach.

“It’s a classical style of yoga that’s extremely accessible from an exercise and adaptability standpoint,” says Robinson.

A full sun salutation in this style involves a steady flow of 12 poses repeated twice in a single sequence for a total of 24 steps. In some traditional practices, people will do 108 sun salutations during the summer solstice as a way to honor the changing of seasons. But you can do as many sun salutations as you feel comfortable year-round.

“It doesn’t have to be long and drawn out,” she clarifies. “It can be done in five minutes or 15 minutes. It’s up to you how many you want to do and what you want to get out of it.”

Robinson covers all 12 steps of a sun salutation and its preparatory phase. Keep in mind, each of these steps is meant to flow directly into the next.

The preparatory phase: Tadasana

Tadasana has many names (like standing mountain pose), but it offers a silent moment of clarity before you begin a sun salutation.

  1. Start in a standing position, feet hip-width apart.
  2. Hands should be at your side with your arms rotated externally so your palms are facing forward.
  3. Keeping your spine straight and the crown of your head directly above you, close your eyes and take in a few deep breaths. If you have difficulty maintaining balance with your eyes closed, you may gaze at a fixed point while taking a few deep breaths instead.

Step 1: Hands-to-heart center (Pranamasana)

Sometimes called “Prayer Pose,” this is the foundational first step to a sun salutation meant to increase your awareness as you focus on your breath.

  1. On an exhale, bring both of your palms together at the center of your chest (as if in a thankful gesture).
  2. Clear your mind and set your intentions: What are your goals in your practice today? Try to focus on your breath and on how your body feels as you move through each of the following poses.

Step 2: Raised arms pose (Hasta Uttanasana)

  1. As you inhale, stretch both arms straight up overhead, reaching toward the sky.
  2. As you raise your arms, keep your feet firmly planted on the ground.
  3. Lift your head to look up with comfort. Be aware of the curve of your upper back and neck while looking up. You shouldn’t feel strained.
  4. For a deeper stretch, gently arch backward to engage your core and lower back.
  5. If that’s too much strain on your back, you can bend your knees and elbows slightly as you raise your arms overhead.

Advertisement

Step 3: Hands-to-feet pose (Pada Hastasana)

  1. As you exhale, keeping your arms overhead and your head in line with your spine, hinge at the hips and reach for your toes (as if you’re going to dive into a swimming pool).
  2. If you find this stretch difficult, bend your knees, flatten your back and rest your hands on your upper legs in a forward fold so you’re looking directly at the floor in front of you.

Step 4: Left-side equestrian pose (Ashwa Sanchalanasana)

  1. On the inhale, place both of your hands on either side of both feet.
  2. Bend your left knee so it doesn’t extend past your toes and then step your right foot back (like a reverse lunge).
  3. Lower your right knee to the floor. Your fingertips can touch the floor or you may use two yoga blocks on either side of your left foot for support as you lift your head to look up toward the ceiling.

Step 5: Mountain pose or downward dog (Parvatasana)

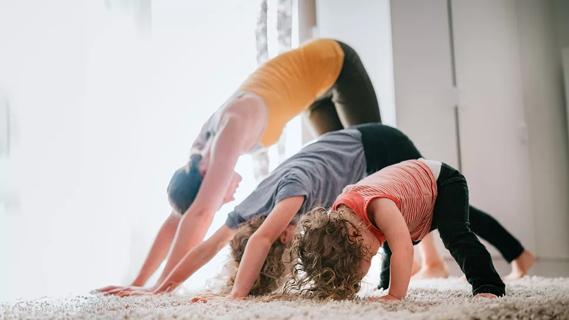
  1. As you exhale, place your palms on the floor in front of you, step your left foot back so it’s beside your right foot, and raise your butt while lowering your head.
  2. Keeping your head relaxed between your arms with your eyes looking at your knees, push through your palms and continue to raise your hips up toward the ceiling.
  3. Keep your knees straight to make a triangle, or bend your knees for comfort, while gently pushing your heels down.
  4. Notice the posture of your spine: Keep your spine straight and shrug your shoulders down away from your ears to activate your upper back muscles.

Advertisement

Step 6: Eight-limbed pose (Ashtanga Namaskara)

  1. As you inhale, tuck your toes and lower your knees to the floor.
  2. Exhale and lower your chest and chin to the floor while keeping your hips lifted.
  3. Your palms should be near your chest so your elbows and arms are tucked at your sides, like an inchworm.
  4. Look up while keeping your shoulders down and back.

Step 6 alternative: Cow pose

The cow pose provides more support and an easier transition for those who find the eight-limbed pose too difficult.

  1. From mountain pose, exhale and lower your knees to the ground so you’re on all fours.
  2. Dip your back and push your belly toward the floor as you inhale and raise your head to look up.

Step 7: Cobra pose (Bhujangasana)

  1. When you take your next inhale, lower your hips to the floor.
  2. Extend your legs out behind you so the tops of your feet are resting on the ground.
  3. Lower your forearms to the ground and push through your palms. Lift your head up off the ground until you’re looking directly ahead or up (as much as you feel comfortable).

Step 7 alternative: Cat pose

This pose is a simpler transition out of the cow pose and a good alternative to cobra.

  1. While in cow pose, inhale.
  2. Then, exhale as you engage your core by pulling your belly in toward your spine as you round your back (like an angry cat).
  3. Draw your head toward the floor, tucking in your chin and looking up toward your belly.

Advertisement

Step 8: Mountain pose (Parvatasana)

  1. From cobra pose or cat pose, exhale as you push through your palms with straight arms and tuck your toes under to push your legs straight.
  2. Lift your butt back up toward the ceiling and elongate your back so you return to the mountain pose from step 5.

Step 9: Right-side equestrian pose (Ashwa Sanchalanasana)

  1. As you inhale, step your left foot forward, placing your foot between both hands and bend your left knee so it doesn’t extend past your toes. Simultaneously, lower your right knee to the floor.
  2. Your fingertips can touch the floor or you may use two yoga blocks on either side of your left foot for support as you lift your head to look up toward the ceiling.
  3. For a deeper stretch, deepen the backward bend, lower your hips, open up your chest and lower both palms to the floor on either side of your left foot.

Step 10: Hands-to-feet pose (Pada Hastasana)

  1. On the inhale, bring your right foot up to meet your left foot.
  2. Stay hinged at your hips so your head is relaxed between your arms as you reach toward your toes.
  3. Alternatively, you can place your hands on your knees and straighten your back as you look down at the floor in front of you.
  4. Exhale.

Step 11: Raised arms pose (Hasta Uttanasana)

  1. As you inhale, stretch both arms straight up overhead, reaching toward the ceiling while you come up to stand.
  2. When standing, lift your head to look up with comfort, not strain with your arms overhead. Be aware of the curve of your upper back and neck while looking up.
  3. For a deeper stretch, while standing with arms overhead, gently arch backward to engage your core and lower back as you lift your head up to gaze toward the ceiling.
  4. To avoid straining your back, keep a bend in your knees as you come up to stand. For your shoulders, keep a bend in your elbows (as if you’re holding a goal post position) as you come up to stand.

Step 12: Return to hands-to-heart center (Pranamasana)

  1. Exhale, and bring your palms together in front of your chest, as if in gratitude.
  2. Repeat the entire 12-step process for a complete sun salutation, starting with the opposite leg.

How to get started with Surya Namaskar

Overall, Robinson recommends flowing through all 12 steps at least four times for two complete sun salutations in a single practice.

You can do more (or less) as you see fit, but the goal of the overall practice is to focus on how you feel in your mind, body and breath as you move through each pose.

“It helps to focus on one pose or a couple of poses at first to really understand each one before you complete a whole sequence,” she adds.

Note that some people may feel lightheaded or dizzy while doing this practice because of the breath work that’s involved and because blood rushes to your head when you’re bending over or inverted (like with downward dog)

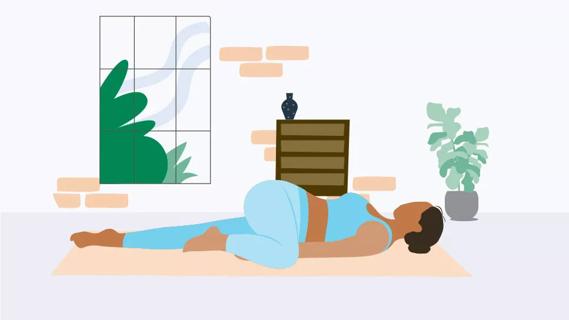
Robinson cautions anyone with a history of stroke or heart conditions and anyone on heart medications to talk with a physical therapist or healthcare provider before doing these poses. And if at any point you feel dizzy or experience pain, stop what you’re doing and slip into the Savasana pose:

  1. Lie on your back on the floor, with your arms extended slightly from your sides, palms facing the ceiling.
  2. Close your eyes and focus on slowing your breath down until you feel relaxed and at ease in your body.
  3. If you have a hard time lying flat on your back, use a rolled towel, bolster or pillow to support your lower back or place it under your knees with your knees bent to relieve tension.

“Savasana is always an option if you need to take a break, and it’s a great pose to use at the end of any practice,” says Robinson. “Lie there until you feel total relaxation, your breathing rate comes down and your heart rate comes back to normal.”

Learn more about our editorial process.

Related Articles

Wasabi root partially ground up on a mini cutting board
October 24, 2025/Nutrition
3 Wasabi Health Benefits

Wasabi root may protect against cancer, food poisoning and memory loss

Assorted foods with zinc, like cashews, dried apricots and salmon
October 20, 2025/Nutrition
How Zinc Benefits Your Body — and How Much You Need Each Day

You typically get enough of this essential nutrient through foods you eat, like meats, fish, nuts and beans

Assorted whole and sliced citrus fruits
October 17, 2025/Nutrition
8 Reasons To Eat More Citrus Fruits

Oranges, grapefruits, lemons, limes and other citrus fruits have nutrients that help support immune system, heart and gut health

People exercising in gym on elliptical and rowing machine
October 13, 2025/Exercise & Fitness
Easy Does It: Why You Should Target Zone 2 Cardio Workouts

Lower-intensity workouts can deliver high-quality health and fitness results

Variety of vitamin- and mineral-rich foods, including salmon, eggs, milk, nuts, spinach and oranges
October 13, 2025/Nutrition
7 Vitamins and Minerals That Help Boost Your Immunity

Eat your fill of vitamins C, B6 and E, plus zinc and selenium

A doctor and a patient have a conversation in front of an enlarged X-ray image of a joint
October 8, 2025/Nutrition
Can Supplements Support Better Bone Health?

Calcium, vitamin D and magnesium are essential — but you should supplement under doctor’s orders

A pile of raspberries up close and viewed from the top down
October 7, 2025/Nutrition
5 Health Benefits of Raspberries

Raspberries are packed with nutrients that can reduce inflammation and prevent chronic diseases

Person adding weights to a barbell while kneeling on the floor
October 7, 2025/Exercise & Fitness
Your Simple Guide to Progressive Overload Training

Incremental changes in your exercise routine can improve your strength and endurance over time

Trending Topics

Person in bed sleeping on their side, covers off
Breathing Problems? Try These Sleep Positions

If you’re feeling short of breath, sleep can be tough — propping yourself up or sleeping on your side may help

A couple looking at skyline, with one person slightly behind the other, head bent down
What Is Anxious Attachment Style — and Do You Have It?

If you fear the unknown or find yourself needing reassurance often, you may identify with this attachment style

Glasses and bottle of yellow-colored prebiotic soda, with mint, lemon and ginger garnish
Are Prebiotic Sodas Good for You?

If you’re looking to boost your gut health, it’s better to get fiber from whole foods

Ad